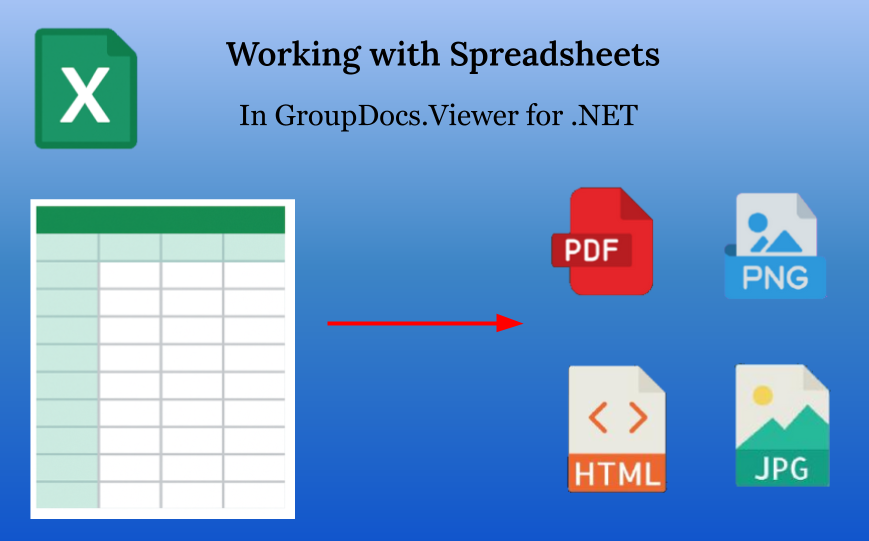
Overview
Spreadsheet documents are documents that contain data in the table form — inside of rows and columns. They are also known as the workbooks. There are many formats of spreadsheet documents — Office Open XML (like XLSX, XLSM, etc.), Microsoft Excel Binary File Format (XLS, XLT), OpenDocument Spreadsheet format (ODS, FODS, OTS), text-based separator-delimited formats (CSV, TSV etc.) and so on. All of them form a so-called Spreadsheet formats family. GroupDocs.Viewer supports almost all spreadsheet formats on import and allows to render (convert) them to HTML, PDF, PNG, and JPEG. This article explains how to do that and which options are available and when and why they should be used.

Basic usage
First of all we need to talk about options. There is a separate class in a public API: SpreadsheetOptions in the GroupDocs.Viewer.Options. This class is designed especially for adjusting the rendering of the Spreadsheet formats family. It is accessible for all four view options through the SpreadsheetOptions property:
- HtmlViewOptions.SpreadsheetOptions when rendering a Spreadsheet document to HTML,
- PdfViewOptions.SpreadsheetOptions when rendering a Spreadsheet document to PDF,
- PngViewOptions.SpreadsheetOptions when rendering a Spreadsheet document to PNG,
- JpgViewOptions.SpreadsheetOptions when rendering a Spreadsheet document to JPEG.
When not specified explicitly, the SpreadsheetOptions property has a default implicit value of the SpreadsheetOptions class instance, which will be explained later in this article.
At a glance, rendering a Spreadsheet document with GroupDocs.Viewer is super-easy and similar to all other formats — create a ViewOptions instance, create a Viewer instance with specified input Spreadsheet document, and call the Viewer.View(viewOptions) method. The following code sample demonstrates rendering of the single input Spreadsheet file to all 4 output formats: HTML, PDF, PNG, and JPEG. Please note that except for creating the instances of options classes there is no spreadsheet-related tuning, so all spreadsheet options are set to default values.
using GroupDocs.Viewer;
using GroupDocs.Viewer.Options;
// ...

HtmlViewOptions htmlOptions = HtmlViewOptions.ForEmbeddedResources("worksheet_{0}.html");
PdfViewOptions pdfOptions = new PdfViewOptions("Output_spreadsheet.pdf");
PngViewOptions pngOptions = new PngViewOptions("worksheet_{0}.png");
JpgViewOptions jpegOptions = new JpgViewOptions("worksheet_{0}.jpeg");

using (Viewer viewer = new Viewer("spreadsheet.xlsx"))
{
    viewer.View(htmlOptions);
    viewer.View(pdfOptions);
    viewer.View(pngOptions);
    viewer.View(jpegOptions);
}
Now let’s talk about the worksheets. Every spreadsheet has at least one worksheet. In most table processing software like Microsoft Excel the worksheets are represented as tabs. Some spreadsheet formats may have only a single worksheet; this includes, for example, all text-based separator-delimited formats (CSV, TSV etc.).
By default the GroupDocs.Viewer renders all worksheets inside the given spreadsheet. But this can be changed. The Viewer.View() method has an overload, which obtains a set of page numbers as a 2nd parameter — Int32[] pageNumbers. When this parameter is used, only those pages will be rendered. This parameter is universal and is applied to all supported formats, which have pages, but in the context of the Spreadsheet formats family it describes exactly worksheet numbers to view.
Please note that page numbering in general and worksheet numbering in particular is 1-based, not 0-based, so it starts from the “1”, not from “0”.
Example below shows how to render 1st and 3rd worksheet to PNG in a spreadsheet that has 3 worksheets.
using GroupDocs.Viewer;
using GroupDocs.Viewer.Options;
// ...

PngViewOptions pngOptions = new PngViewOptions("worksheet_{0}.png");
using (Viewer viewer = new Viewer("spreadsheet.xlsx"))
{
    viewer.View(pngOptions, 1, 3);
}
Splitting worksheets into pages
GroupDocs.Viewer renders documents to the pages, where under a page we understand some rectangular area of relatively small size, comparable to the area of display, or A4 paper. On the other hand, the worksheets may be very big. In particular, the now obsolete XLS format supports max 256 columns and 65536 rows, while the newer XLSX (Office Open XML Workbook) format and the Microsoft Excel both support up to 16384 columns and 1048576 rows. “Fitting” worksheets into pages is a crucial part of the rendering spreadsheets with GroupDocs.Viewer. In order to fit the worksheet into page(s), the GroupDocs.Viewer performs a worksheet splitting — worksheet is divided into multiple rectangular chunks, and each of them is placed on a separate page. There are 5 different methods, they are listed and described below.
What is important — all these splitting methods are specified using the same way — using a specific static method (factory method) that creates an instance of the SpreadsheetOptions class.
Render whole worksheet on one page
SpreadsheetOptions.ForOnePagePerSheet()
The easiest and simplest way — turn off a splitting and adjust the page size to fit all content of the whole worksheet. This is a good choice when it is already known that the worksheet has a small size. However, if a worksheet is really big, this approach may lead to awful results. In particular, when rendering to the HTML format, the resultant HTML document may be huge, tens or even hundreds of MiB, which may cause troubles while viewing such big files in the web-browsers. When rendering to the JPEG format, things may be even worse if the width or height will overcome the max limit of 65535 pixels. So use this mode deliberately.

Split worksheet by page breaks
SpreadsheetOptions.ForRenderingByPageBreaks()
Microsoft Excel itself adds automatic page breaks based on paper size and page settings, such as orientation and margins. If you switch to the “View” tab and enter the “Page Break Preview” mode, you can see blue lines that divide the whole worksheet area on rectangular chunks, each of them is labeled as “Page 1”, “Page 2”, and so on. This is how Microsoft Excel “suggests” to split a worksheet onto pages.
With this method the GroupDocs.Viewer follows the Microsoft Excel and splits the worksheets according to the page breaks, like Microsoft Excel does.
Need to mention that this option — to split a worksheet by page break — is a default option of the BaseViewOptions.SpreadsheetOptions property, so when you create an instance of view options class, the “ForRenderingByPageBreaks()” option is selected by default.
Render only print area
SpreadsheetOptions.ForRenderingPrintArea()
Along with the page breaks, the Microsoft Excel has a “Print Area” concept. Print Area is actually one or more cell ranges in a worksheet, which are designated for printing, while any content outside of the Print Area will not be printed at all. For adding some cell range to the Print Area, go to the “Page Layout" tab, click on the “Print Area” button and then click on “Set Print Area” item (see screenshot below). In order to add another cell range to the Print Area, select this new range, click on the “Print Area” button and then click on “Add to Print Area” item at this time. In the “Page Break Preview” mode you can see all cell ranges in the Print Area.

Render print area and split by page breaks
SpreadsheetOptions.ForRenderingPrintAreaAndPageBreaks()
GroupDocs.Viewer has a unique feature — combining the Print Area and page breaks in the single mode. In this case GroupDocs.Viewer takes into account all cell ranges of print area and page breaks in the worksheet and applies them simultaneously to split a worksheet onto pages.
In the following screenshot the red line shows the print area, and the blue line shows page breaks.

Split worksheet into pages manually by rows and columns
SpreadsheetOptions.ForSplitSheetIntoPages(int countRowsPerPage)
SpreadsheetOptions.ForSplitSheetIntoPages(int countRowsPerPage, int countColumnsPerPage)
Sometimes none of the splitting methods, described above, is acceptable, or the spreadsheet has a format that does not support page breaks and Print Areas, for example, the text-based CSV. For such cases GroupDocs.Viewer allows to manually specify the number of rows and/or number of columns that should be present on every page. In short, the difference between splitting by rows only vs. splitting by rows and columns is illustrated on the screenshot below.
If the 1st overload of the ForSplitSheetIntoPages method is used, with one parameter, then the splitting by rows only is enabled. If the 2nd overload is used, where two parameters are specified, then the splitting by rows and columns is enabled.

Adjusting additional options
All described above is essential and enough for rendering spreadsheets using GroupDocs.Viewer. However, there are plenty of additional options, which are not mandatory, but allow users to adjust the rendering result even more.
Some of these options are represented as the properties of the SpreadsheetOptions class, which itself is accessible as a SpreadsheetOptions property of the view options class. Others however are located in the ViewOptions abstract class, common for all 4 rendering modes.
Render row and column headings
When MS Excel or a similar table processing program opens a spreadsheet document, it displays the column and row heading, columns are lettered (A, B, C, AA, AB, …) and rows are numbered (1, 2, 3, …, 1048576). When rendering, GroupDocs.Viewer by default does not display these heading, because they are a part of the interface of the table processor, but not the document itself. But this can be changed with the RenderHeadings property of a boolean type. By default it is disabled and has a false value, but when enabled (true), the rows and columns headings will be present in the output document, as can be seen on a screenshot below.

Render worksheet gridlines
The concept of this option is very similar to the previous one. By default the GroupDocs.Viewer does not display the gridlines between cells, because they are not the part of the spreadsheet, but rather a way of representing a table content of a particular table processor. However, using a RenderGridLines property of a boolean type it is possible to mimic the MS Excel behavior. Assign a true value to the SpreadsheetOptions.RenderGridLines property, and the gridlines will be present in the output document, as shown on a screenshot below.

Control cell text overflow
It is a quite common scenario, when some text contains a text, and this text does not fit into the boundaries of this cell. How to display this text properly? GroupDocs.Viewer provides a special property SpreadsheetOptions.TextOverflowMode for solving such a problem. The TextOverflowMode property has a value of the type with the same name, TextOverflowMode, and it is an enum type with 4 possible items, explained below.
OverlayIfNextIsEmpty
By default the SpreadsheetOptions.TextOverflowMode property has a OverlayIfNextIsEmpty value, which mimics the default Microsoft Excel behavior. In short, this value allows text to overflow into adjacent cells, but only if these adjacent cells have no data. If adjacent cells are not empty, the overflowing text is truncated.

The screenshot above shows the HTML file, rendered from input XLSX with OverlayIfNextIsEmpty value. Take a note on the cell “B2” — it has a long text, and it is truncated, because the “C2” cell is not empty. The “C3” cell, however, also has a long text that does not fit, but it overflows over the “D2” and “E2” cells, because they are empty.
Overlay
The TextOverflowMode.Overlay value is slightly similar to the previous, but may be considered as more aggressive: long text, that does not fit into the original cell’s boundaries, always overflows, regardless of the adjacent cells. If adjacent cells also have some text or other data, it will be erased.

Screenshot above demonstrates how this works. Long text from the cell “B2” overflows into the adjacent cells “C2”, “D2”, “E2”, “F2”. As a result, the original text from the cells “C2” and “F2” is erased.
HideText
The TextOverflowMode.HideText mode works as an opposite to the previously described Overlay mode — instead of overflow it ultimately truncates the text, the does not fit into the boundaries of its own cell, regardless whether there is a free space in adjacent cell(s) or not.

On the screenshot above this can be seen for the cell “C3” — despite there is a free space in adjacent “D3” and so on, the text is unconditionally truncated.
AutoFitColumn
The TextOverflowMode.AutoFitColumn value solves the problem using another approach — it increases the column width to fit the text of any cell. So regardless of how long the text inside the particular cell is — the width of the columns, where this cell is located, will be increased to fit the whole string.

Screenshot above shows how it works. Of course, this approach may not be suitable in some cases, especially when the text in cell(s) is extra long — this will make the page to be extremely wide with annoying horizontal scrolling.
Render hidden rows and columns
Microsoft Excel and other table processors allow hiding particular rows and columns. By default GroupDocs.Viewer does not render such rows and columns, but this behavior may be changed. The ViewOptions.SpreadsheetOptions.RenderHiddenRows and ViewOptions.SpreadsheetOptions.RenderHiddenColumns properties, when set them to true, allow to display hidden rows and columns in the output file when rendering spreadsheet in HTML, PDF, PNG, or JPEG format.
Render hidden worksheets
Like hidden rows and columns, explained above, the spreadsheet file may contain one or more hidden worksheet(s). And as in the previous case, by default the GroupDocs.Viewer does not render the hidden worksheets. But this may be changed using the RenderHiddenPages property by setting its value to true. Need to mention that unlike the previously described properties, the RenderHiddenPages is located not in the SpreadsheetOptions, but in the BaseViewOptions abstract class that is common for all view options.
Skip empty rows and columns
Some spreadsheets are “sparse” — they contain a lot of empty spaces, which may occupy too much space. GroupDocs.Viewer has a feature to skip empty rows and columns from the rendering. If this feature is enabled, empty rows and/or columns are excluded from the resultant HTML, PDF, PNG and JPEG. The boolean properties SpreadsheetOptions.SkipEmptyRows and SpreadsheetOptions.SkipEmptyColumns are responsible for this feature.

Screenshot above demonstrates both SkipEmptyRows and SkipEmptyColumns are enabled.
Render or hide cell comments
Cells within a spreadsheet document may have comments, and by default the GroupDocs.Viewer renders them all. But this can be disabled using the BaseViewOptions.RemoveComments property — if set its value to true, no comments will be rendered. Make a note that this property is located in the BaseViewOptions class, not in the SpreadsheetOptions.

Screenshot above demonstrates rendering XLSX file with cell comments to PNG format with default options — comment for the “E2” cell is present in the resultant PNG file.
Set worksheet margins in the output PDF pages
When rendering worksheets to the PDF format, it is possible to control the page margins — the distance in centimeters from the border of the page to the content. There are 4 properties to control the top, right, bottom, and left margins:
SpreadsheetOptions.TopMarginSpreadsheetOptions.RightMarginSpreadsheetOptions.BottomMarginSpreadsheetOptions.LeftMargin
By default all these 4 properties have negative values, which means that the default margins are applied by the GroupDocs.Viewer. However, it is possible to set these values explicitly. Need to emphasize that page margins are applied only when the target format is PDF.
The following piece of source code demonstrates creating the PdfViewOptions, setting all 4 margins and rendering a document:
using GroupDocs.Viewer;
using GroupDocs.Viewer.Options;
// ...

PdfViewOptions pdfViewOptions = new PdfViewOptions("Output.pdf");
pdfViewOptions.SpreadsheetOptions = SpreadsheetOptions.ForOnePagePerSheet();
pdfViewOptions.SpreadsheetOptions.TopMargin = 2;
pdfViewOptions.SpreadsheetOptions.BottomMargin = 4;
pdfViewOptions.SpreadsheetOptions.LeftMargin = 8;
pdfViewOptions.SpreadsheetOptions.RightMargin = 0;

using (var viewer = new Viewer("spreadsheet.xlsx"))
{
    viewer.View(pdfViewOptions);
}
The following image demonstrates the result:

Conclusion
Spreadsheet formats are quite complex, and documents may have very different content of variable type and length. In a lot of cases it is impossible to render the complex spreadsheet document to some format with default options, and that’s why GroupDocs.Viewer provides such a comprehensive set of properties; with them every user will be able to adjust the rendering to meet his own needs.
See Also
- Render Excel and Apple Numbers spreadsheets as HTML, PDF, and image files
- Split a worksheet into pages
- Specify spreadsheet rendering options
Get a free trial
You can download a free trial version of GroupDocs.Viewer for .NET from releases.groupdocs.com. You can also acquire a temporary license to try all features and functionalities without restrictions from here.