Why Word’s Built-in Watermarks Aren’t Secure Enough
If you’ve ever tried protecting a Word document with Microsoft Word’s built-in watermark feature, you probably discovered a frustrating truth: anyone can remove them in seconds. Simply double-click the header, select the watermark, and press delete. Gone.
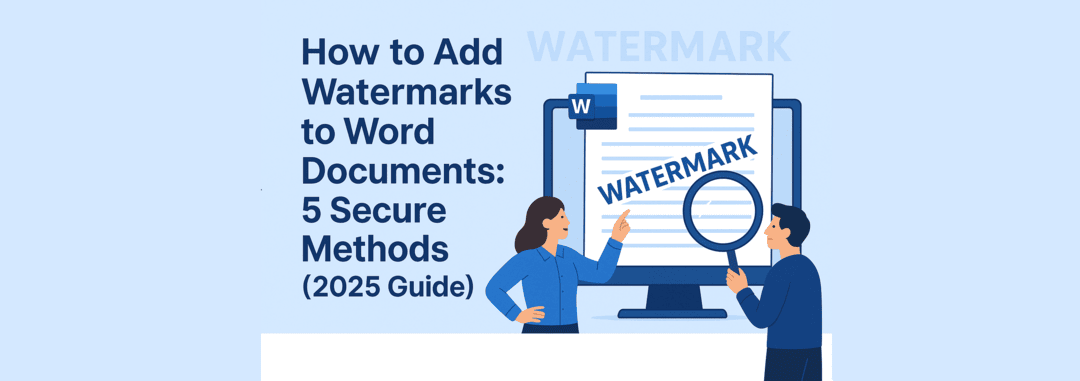
In this comprehensive guide, you’ll learn five professional methods to add secure watermarks to Word documents using GroupDocs.Watermark for .NET. Each approach offers different levels of protection, from basic header watermarks to advanced locked sections that resist removal attempts.
What you’ll learn:
- Why standard Word watermarks fail to protect sensitive documents
- How to implement 5 increasingly secure watermarking techniques
- Code examples you can use immediately in your C# projects
- Visual comparisons showing exactly how each method works
- When to use each protection level for your specific needs
Download Complete Code Examples
All the code samples demonstrated in this article are available in our official GitHub repository. You can clone, download, or browse the complete working examples to start implementing watermark protection in your own projects.
🔗 Repository Link
GroupDocs.Watermark Word Protection Examples
Method 1: Simple Header Watermark (Basic Protection)
Protection Level: Low | Difficulty: Easy | Best for: Internal documents
Let’s start with the most straightforward approach: adding a watermark to your document’s header section. While this method is easy to implement, it’s also the easiest to remove - making it suitable only for low-security scenarios.
How it works: The watermark is inserted as a shape object in the document header. It appears on every page automatically, but offers minimal protection against removal.
private static void AddSimpleHeaderWatermark()
{
    Console.WriteLine("Adding simple header watermark...");
    var loadOptions = new WordProcessingLoadOptions();
    using (var watermarker = new Watermarker(InputFile, loadOptions))
    {
        var watermark = new TextWatermark("Confidential", new Font("Arial", 19))
        {
            VerticalAlignment = VerticalAlignment.Center,
            HorizontalAlignment = HorizontalAlignment.Center,
            RotateAngle = 25,
            ForegroundColor = Color.Red,
            Opacity = 0.8
        };
        watermarker.Add(watermark);
        watermarker.Save(Path.Combine(OutputDir, "header_watermark.docx"));
    }
    Console.WriteLine("Header watermark added.");
}
The Security Weakness Exposed
Here’s the problem: if you open the document in Microsoft Word, double-click the header area, and activate header editing mode - the watermark appears as a simple shape that can be deleted with one click.
Watch how easily it’s removed:

When to use this method: Quick internal documents, draft versions, or situations where you need visible branding but don’t require strong security.
Method 2: Tiled Watermarks (Medium Protection)
Protection Level: Medium | Difficulty: Easy | Best for: Multi-page documents requiring moderate security
Tiled watermarks significantly improve protection by creating multiple watermark instances across each page. Instead of one shape in the header, you get dozens of overlapping watermarks that make manual removal tedious and time-consuming.
How it works: The watermarking engine automatically duplicates your watermark text across the entire page surface with customizable spacing. Removing all instances becomes impractical for documents longer than a few pages.
private static void AddTiledWatermark()
{
    Console.WriteLine("Adding tiled watermark...");
    var loadOptions = new WordProcessingLoadOptions();
    using (var watermarker = new Watermarker(InputFile, loadOptions))
    {
        var watermark = new TextWatermark("Protected Document", new Font("Arial", 19))
        {
            VerticalAlignment = VerticalAlignment.Center,
            HorizontalAlignment = HorizontalAlignment.Center,
            RotateAngle = 25,
            ForegroundColor = Color.Red,
            Opacity = 0.9,
            TileOptions = new TileOptions
            {
                LineSpacing = new MeasureValue
                {
                    MeasureType = TileMeasureType.Percent,
                    Value = 12
                },
                WatermarkSpacing = new MeasureValue
                {
                    MeasureType = TileMeasureType.Percent,
                    Value = 12
                }
            }
        };
        var options = new WordProcessingWatermarkSectionOptions
        {
            Name = "TiledShape",
            AlternativeText = "Repeated watermark"
        };
        watermarker.Add(watermark, options);
        watermarker.Save(Path.Combine(OutputDir, "tiled_watermark.docx"));
    }
    Console.WriteLine("Tiled watermark added.");
}
Why This Works Better
Imagine trying to remove watermarks from a 20-page report where each page contains 15-20 overlapping instances. Even on a single page, the repetitive deletion process becomes frustrating enough to deter casual removal attempts.
See the tiled protection in action:

When to use this method: Contracts, proposals, client-facing documents, or any multi-page content where you need visual deterrence against unauthorized use.
Method 3: Image Tiled Watermarks (Medium Protection)
Protection Level: Medium-High | Difficulty: Easy | Best for: Brand protection, copyright claims, and professional documents
Image watermarks take protection to the next level by using your company logo, signature, or custom graphics instead of plain text. When tiled across the document, they create a professional security layer that’s harder to replicate or forge than simple text watermarks.
How it works: The watermarking engine loads your image (PNG, JPG, or other formats) and automatically tiles it across every page with customizable spacing, rotation, and transparency. This creates a distinctive visual signature that’s uniquely yours.
private static void AddImageWatermark()
{
    using (Watermarker watermarker = new Watermarker(InputFile))
    {
        // Create the image watermark object
        var watermark = new ImageWatermark("logo.png");
        // Configure tile options
        watermark.TileOptions = new TileOptions()
        {
            LineSpacing = new MeasureValue()
            {
                MeasureType = TileMeasureType.Percent,
                Value = 10
            },
            WatermarkSpacing = new MeasureValue()
            {
                MeasureType = TileMeasureType.Percent,
                Value = 8
            },
        };
        // Set watermark properties
        watermark.Opacity = 0.7;
        watermark.RotateAngle = -30;
        // Add watermark
        watermarker.Add(watermark);
        watermarker.Save(Path.Combine(OutputDir, "image_watermark_word.docx"));
    }
}
Why Image Watermarks Provide Better Security
Unlike text watermarks that anyone can recreate by typing the same words, image watermarks contain unique visual elements that are much harder to reproduce:
- Brand logos with specific colors, gradients, and design elements
- Company seals or official stamps that establish authenticity
- Digital signatures that can be verified visually
- QR codes that link back to verification systems
- Complex graphics that would take significant effort to recreate
The tiled pattern makes it nearly impossible to remove every instance without leaving visible artifacts. Even if someone removes 95% of the watermarks, the remaining 5% still proves the document’s origin.
See the professional image watermark in action:

Method 4: Password-Protected Hidden Section (High Protection)
Protection Level: High | Difficulty: Medium | Best for: Confidential documents requiring strong security
This advanced technique inserts your watermark into a hidden, password-protected section that’s locked in “form fields only” mode. Even if someone discovers the watermark, they can’t edit or remove it without the password.
How it works: The watermark resides in a separate document section that’s configured as non-editable. Users can still read the document normally, but the watermark section requires password authentication to modify.
private static void AddLockedWatermark_AllowOnlyFormFields()
{
    Console.WriteLine("Adding locked watermark (allow form fields)...");
    using (var watermarker = new Watermarker(InputFile))
    {
        var watermark = new TextWatermark("Do Not Edit",
        new Font("Arial", 36, FontStyle.Bold | FontStyle.Italic))
        {
            HorizontalAlignment = HorizontalAlignment.Center,
            VerticalAlignment = VerticalAlignment.Center,
            Opacity = 0.4,
            RotateAngle = 45,
            ForegroundColor = Color.Red
        };
        var options = new WordProcessingWatermarkPagesOptions
        {
            IsLocked = true,
            Password = "012345",
            LockType = WordProcessingLockType.AllowOnlyFormFields
        };
        watermarker.Add(watermark, options);
        watermarker.Save(Path.Combine(OutputDir, "locked_allow_form_fields.docx"));
    }
    Console.WriteLine("Locked watermark added (AllowOnlyFormFields).");
}
See the password protection working:

The Weakness of the manual Microsoft Word approach
While this method offers excellent security, there’s an important limitation to understand. If you try to recreate this protection manually in Microsoft Word (using the built-in “Restrict Editing” feature), the hidden section still occupies space in the document structure. This can cause layout issues - for example, an extra blank page may appear if your original content completely fills the available space.
See the manual Word approach and its limitations:

When to use this method: Legal documents, financial reports, intellectual property, or any content where unauthorized editing must be prevented.
Method 5: Locked Header with Editable Content Ranges (Maximum Protection)
Protection Level: Very High | Difficulty: Medium | Best for: Documents requiring both security and user interaction
This sophisticated approach combines locked headers with Microsoft Word’s editable ranges feature. The watermark sits in a password-protected header that’s completely locked, while specific document areas remain editable for legitimate users.
How it works: The entire header section (containing your watermark) is locked with read-only protection. The document body is then marked with editable ranges, creating a security model where users can only modify pre-approved sections.
private static void AddLockedHeaderWatermark()
{
    Console.WriteLine("Adding locked header watermark...");
    var loadOptions = new WordProcessingLoadOptions();
    using (var watermarker = new Watermarker(InputFile, loadOptions))
    {
        var watermark = new TextWatermark("Company Confidential", new Font("Arial", 19))
        {
            VerticalAlignment = VerticalAlignment.Center,
            HorizontalAlignment = HorizontalAlignment.Center,
            RotateAngle = 25,
            ForegroundColor = Color.Red,
            Opacity = 0.8
        };
        var options = new WordProcessingWatermarkSectionOptions
        {
            SectionIndex = 0,
            IsLocked = true,
            Password = "012345",
            LockType = WordProcessingLockType.ReadOnly
        };
        watermarker.Add(watermark, options);
        watermarker.Save(Path.Combine(OutputDir, "locked_header_watermark.docx"));
    }
    Console.WriteLine("Locked header watermark added.");
}
Watch the locked header protection:

The Visual Trade-off in Microsoft Word
When you open documents with editable ranges in Microsoft Word, the editable sections appear highlighted in yellow. This visual indicator helps users identify where they can type, but it may affect the document’s professional appearance.
See the yellow highlighting in action:

When to use this method: Template documents, forms requiring user input, collaborative documents with fixed branding, or scenarios where you need granular control over editing permissions.
Get Started with GroupDocs.Watermark Today
Ready to implement professional watermark protection in your documents? Here’s your quick-start roadmap:
Step 1: Get a Free Trial
Download and install GroupDocs.Watermark for .NET from the official release page. No credit card required.
For testing all features without restrictions, grab a temporary license that gives you full access to the API.
Step 2: Scale Your Solution
- Start Small: Begin with one document type and test each protection method
- Monitor Performance: Track watermarking speed and file size impact
- Gather Feedback: Work with your team to refine watermark designs
- Expand Integration: Connect with your document management systems
Step 3: Explore More Resources
Get the most from GroupDocs.Watermark with these comprehensive resources:
- Complete .NET Code Examples - Ready-to-use C# implementations
- Java Implementation Guide - Cross-platform solutions
- Node.js Examples - JavaScript/TypeScript integration
- Download Free Trial - Start protecting documents immediately
- API Documentation - Full technical reference
- Community Support Forum - Get help from experts and developers
Frequently Asked Questions
Q: Does adding watermarks increase file size? A: Yes, but minimally. Tiled watermarks add more than simple headers due to multiple shape objects.
Q: Can I watermark PDFs and other formats? A: Absolutely. GroupDocs.Watermark supports 40+ file formats including PDF, Excel, PowerPoint, and images.
Q: Do I need Microsoft Word installed? A: No. GroupDocs.Watermark is a standalone .NET library that works independently of Microsoft Office.
Q: Can users still print watermarked documents? A: Yes, watermarks remain visible in printed copies unless you specifically configure them otherwise.
Conclusion: Choosing the Right Protection Level for Your Documents
Microsoft Word’s built-in watermark feature is convenient, but it fails the moment security matters. As we’ve demonstrated, a simple double-click can remove standard Word watermarks in seconds. GroupDocs.Watermark for .NET changes the game by offering five progressively secure protection methods:
- Simple Header Watermarks - Perfect for internal drafts and low-risk documents
- Tiled Watermarks - Excellent deterrent for multi-page contracts and proposals
- Password-Protected Sections - Strong security for confidential business documents
- Locked Headers with Editable Ranges - Ideal for templates and collaborative documents
- Enterprise Legal Protection - Maximum security for compliance and legal requirements
The key is matching the protection level to your document’s sensitivity. Not every file needs military-grade security, but critical documents deserve more than Word’s easily-removable watermarks.